Pages

Tuesday, March 31, 2015

March ECD Design Team Challenge- Flowers!!

I love flowers! They make me smile and bring me joy. This month's theme for the Elizabeth Craft Designs design team challenge was...you guessed it- flowers! I used the new Garden Notes Hydrangea and our beautiful Asian Vase to create this card.


Card Base- standard A2 size from white cardstock (5 1/2" x 8 1/2" folded in half). Cut a piece of pattern paper to 4" x 5 1/4" and a strip of a coordinating pattern paper to 4" x 2". Ink with brown ink and adhere to front.

Vase - Diecut Asian Vase from White Iridescent Shimmer Sheetz. Emboss with Lots of Dots Embossing Folder. Ink outer edge with brown ink. Adhere to card front on foam adhesive.

Flowers- Diecut stems, leaves and petals from Garden Notes- Hydrangea. To get the variety of color for the petals, ink a piece of cream colored cardstock with VersaMagic ink mixing the following colors on the cardstock- Aegean Blue, Sea Breeze and Tea Leaves. Diecut 6 sets of petals. 6 stems and 6 sets of leaves. Shape and assemble directly on the card. You can see a video tutorial of how to assemble these flowers HERE.


To complete add Gold Corners and Borders to card front.

Thanks for stopping by today! To see all the other amazing floral creations from out Design Team members head over to the Elizabeth Craft Designs blog and be prepared to be amazed!




Monday, March 30, 2015

H is for.....

Hensley of course!!


Hi Friends!

This week at Scrapp'n Savvy we hosted our quarterly Sampler.  During this time all the teachers come in talk about upcoming classes and we do a project with the customers. This time we got to make a monogram letter. The teachers were asked to each do one representing some aspect of what we teach. I knew I wanted to showcase flowers some how and thought it would be fun to use the Garden Notes- Bluebonnets from ECD. I went the "Texas" route of course and also used the 3D star from the Karen Burniston's Star Accordion die to incorporate the Lone Star. The letter was stained and then decoupaged with the bandanna paper. The silk flowers were provided. What do you think?Don't those gorgeous Bluebonnets look real?! It was fun to make and will be a great piece of home decor.


Thursday, March 26, 2015

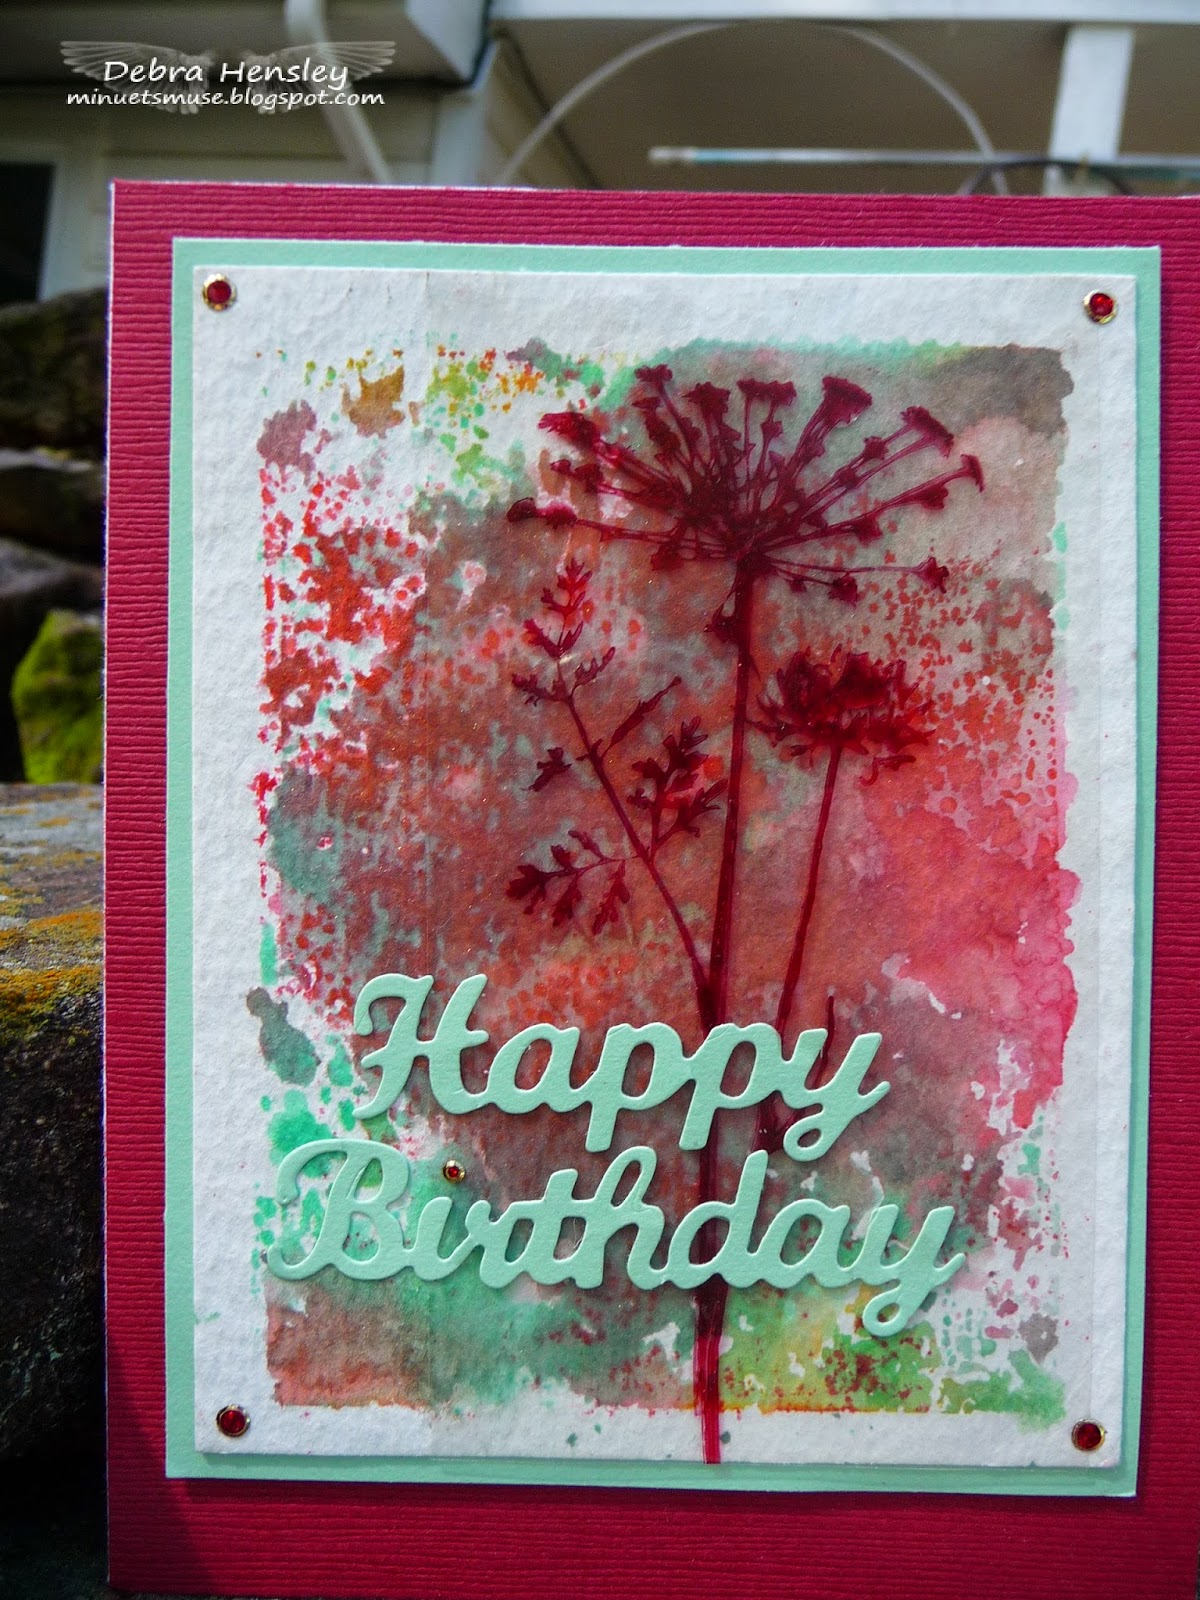
Watercolor and Acetate Card

Hi Everyone!
Here is another card we made in class this month. I came across this fun watercolor and ink technique  on Pinterest and wanted to give it a try. I love how it turned out. Elizabeth Craft Designs large Happy Birthday die was the perfect size to add to the front.


Instructions:

Adhere red cardstock to front of a standard A2 size card base. Make watercolor background.

Watercolor Background:
Press Distress Ink pads on acrylic block in different spots. Colors used- Abandoned Coral, Cracked Pistachio, Wild Honey, Festive Berries. Spritz well with water from a mister. Flip block over and stamp, centered onto watercolor paper. Let the block sit for a few seconds on the paper so the colors will be absorbed. Lift off block. Repeat as desired until you achieve a look you like. Dry with heat tool. Spritz with bronze mist. Dry

Stamp flower on acetate strip with Stazon Ink. Be careful not to let the stamp move on the acetate or it will smear. Set aside to dry. Adhere watercolor piece to green mat. Adhere dry acetate piece to watercolor paper about 1/8” from right side. Using mini glue dots positioned behind the thickest parts of the stamped image will secure the acetate without showing on the front. Add to watercolor piece to card front on pop dots. Diecut Happy Birthday from green cardstock. Adhere to card front over watercolor and acetate about 3/4” from bottom. Add glitter dots to corners..


Monday, March 23, 2015

Susan's Garden Blogpost- Peony

Hi Friends!
Today is my turn to share a project with you for Susan's Garden Design Team on the ECD Blog. I am absolutely loving the Garden Notes collection of Flower dies- they fit so perfectly on cards. I created this Peony card using one of Susan's beautiful sentiment stamps as well. Come see how I made this card and give it a try!


Saturday, March 21, 2015

ECD Blogpost- Inked Embossing Folder Rose Card

Hi Everyone!
It's my turn to share a project on the Elizabeth Craft Design's blog. Stop by and see a fun technique using an embossing folder to create this easy and beautiful card! I'd love to hear what you think!


Thursday, March 19, 2015

Ready for Some Sunshine!

Hi Friends,
I had a great DistINKtive card class this week at Scrapp's Savvy. We made some fun cards! The weather here in Texas has been warming up and I have had the beach on my mind!  I've been dying to play with Rocky the Crab and all the fun Beach themed dies from Karen Burniston and finally got the chance for this month's class. Isn't he cute?!


Directions:

Fold card base in half. Diecut Rocky the crab- shadow layer from black, detail layer and shovel from red, eyes and 3 seashells from white. Assemble. Diecut waves from blue cardstock. Diecut sand hills and palm tree hill from tan cardstock. Diecut palm tree from brown and palm leaves from green. Adhere leaves to top of brown tree.

Ink sky with white ink to simulate clouds. Ink sand piece with brown ink and spritz with bronze mist. Scribble some brown Wink of Stella on a craft mat and gently press shells into ink. Draw lines on palm trunk. Color mini palm trees- leaves with green distress marker and trunks with brown distress marker. Clip off small palm from right side of diecut. Color sun with yellow Wink of Stella. Ink waves with blue ink and color wave edges with white ink or white Wink of Stella.

Assemble card. Adhere palm sand layer flush, starting about 2” from bottom. Add second layer on pop dots. Add waves flush with bottom on pop dots on bottom edge only. Add palm tree with pop dots on top of tree. Add sun and sentiment to top of card. Add Rocky on pop dots. Add pail and shells as shown. Add negative of wave piece to top inside of card and small palm tree to bottom right to complete.


Thanks for stopping by! 
Have a great sunny day!

You can get these fun dies at your local scrapbook store ( like Scrapp'n Savvy!) or online at the Elizabeth Craft Designs website. Here are the links:

972 Accordion Rectangle ( speech bubble)


Tuesday, March 10, 2015

February Copic Cards Class

Hi Everyone!
We had a wonderful Copic Card class last month and I finally have a chance to share the cards we did with  you. The first image uses the stamp set Gazebo TF( tri-fold) from Art Impressions. The set comes with three stamps that can be used separately or together in a tri fold card. Colored with Copic markers in a relaxed style I like to call Loosy Goosy... more of an impressionist look,  not worrying about precise blending and using lots of loose squiggles to layer colors. I love the effect!

 Front

'

Inside

Right side


Left side

Copic Colors used:
Sign Panel
Sign: BV20, E55, R24, YG25
Box 1: R24, R46, BV20
Box 2: YG01, YG25, YG17, BV20, BV13
Box 3: BV20, BV04, V17, BV06, V06
Grass: YG01, G12, YG25, YG17
Shadow:BV20

Cake Panel
Cake: 0, R24, BV04, V17, V06, YR31
Flowers: R24, R46
Foliage: G12, YG01, YG25, YG17
Shadow: BV20, BV13, V17

Gazebo Panel:
Balloons: R24, R46
Gazebo/ Tree Branches: E55, E57, E59
Lilacs/Shadows: BV20, BV13, BV04, V17, BV08
Greenery: YG01, YG17, YG25, G12
Ground: E55, E57, E59


The second card we did uses an image from Lili of the Valley- Hydrangeas. Love this one too! Colored the standard way with Copic Markers.


Copics Colors used:

Leaves: G94, G99
Flowers: BV00, V01, V06, V16, BV13
Vase: E31, E33, BV00
Bow: YR31, E33
Present: YR31, G12, G94, W1
Shadow W1
Ground: BV00, E33, W1

Thanks for stopping by today! I hope you get a little inspiration or pull out your Copic Markers and color something fun today!

Saturday, March 7, 2015

ECD Blogpost- Copics on Glitter

Hi Everyone,
Today is my day to share a post on the Elizabeth Craft Designs blog. Stop by and see how I made this card. There are some great tips for coloring with alcohol based markers on Silk Microfine Glitter and Peel-offs. Let me know what you think!